TL;DR:
- Inspecting used shipping containers thoroughly before purchase prevents costly repairs by identifying structural damage, rust, and leaks early. Essential tools include a flashlight, moisture meter, and camera, while inspecting exterior corner posts, roof, walls, and doors helps assess condition and alignment. Proper documentation of findings empowers effective negotiation and ensures compliance with safety and cargo standards.
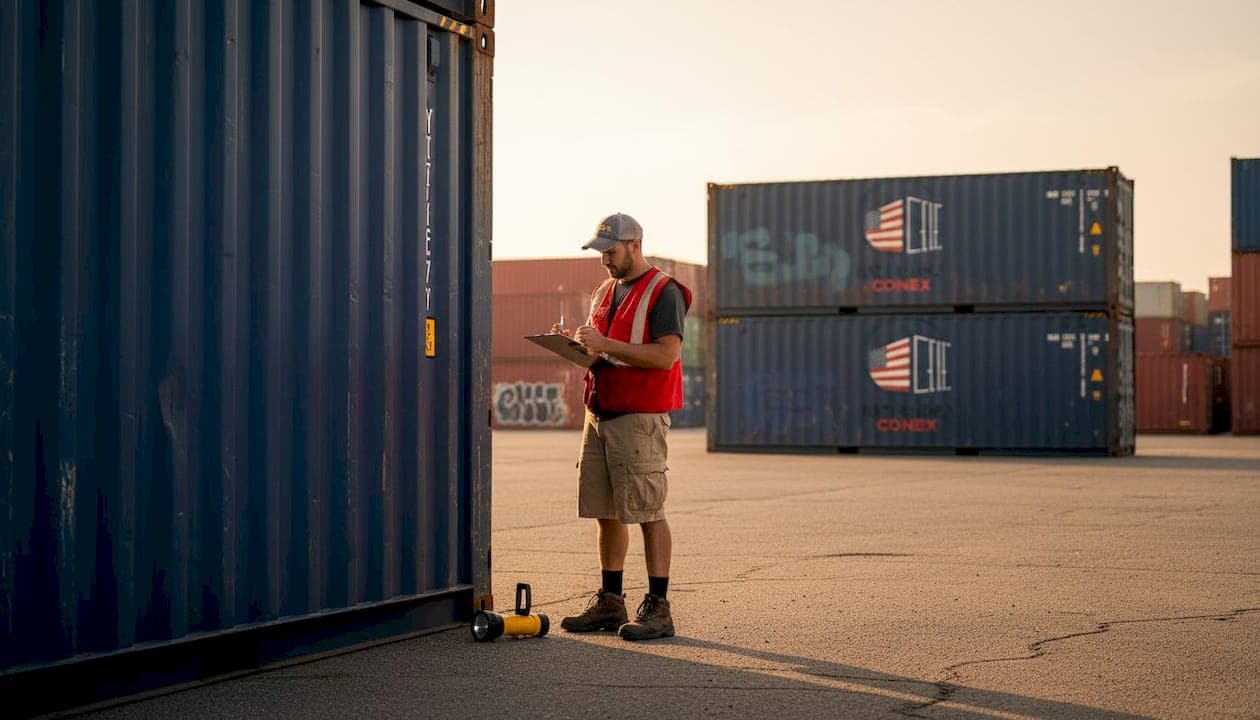
Buying a used shipping container without a proper inspection is one of the most expensive mistakes you can make. Structural damage, hidden rust, and compromised seals can turn a bargain into a repair nightmare within weeks. Knowing how to inspect used containers before any money changes hands protects you from those hidden costs and gives you real leverage at the negotiation table. This guide walks you through every check, from the moment you arrive on site to the final decision: buy, negotiate, or walk away.
Table of Contents
- Key takeaways
- How to inspect used containers: what to bring and know first
- Exterior and structural inspection: a step-by-step walkthrough
- Interior inspection: floor, leaks, cleanliness, and odors
- Common inspection mistakes that cost buyers money
- Final verification and making your purchase decision
- My honest take on container inspections
- Buy with confidence from Americaconex
- FAQ
Key takeaways
| Point | Details |
|---|---|
| Bring the right tools | A flashlight, moisture meter, and camera are non-negotiable for a thorough inspection. |
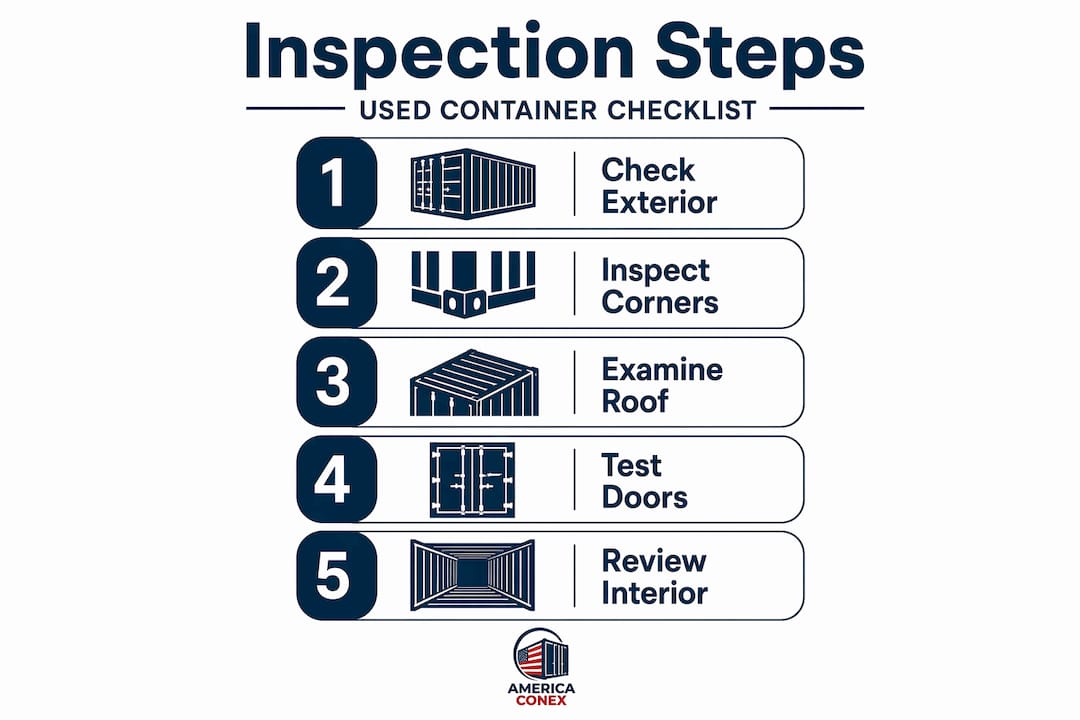
| Exterior checks come first | Examine corner posts, roof, sidewalls, and doors before stepping inside. |
| The darkness test reveals leaks | Close the container doors and check for any light penetrating the walls or roof. |
| Document everything you find | Photos and written notes protect you during price negotiations and any future claims. |
| Know your grades before buying | Understanding container condition grades helps you set realistic expectations and spot misrepresented units. |
How to inspect used containers: what to bring and know first
You cannot do a useful inspection empty-handed. Before you visit a depot or yard, assemble a basic toolkit so you are not guessing when you find something questionable.
Here is what experienced buyers bring:
- Flashlight or headlamp: Lighting inside a container is poor. You need a powerful beam to spot corrosion, floor damage, and small holes.
- Moisture meter: Press it against walls and floors to detect hidden water infiltration before it becomes visible mold.
- Camera or smartphone: Document every finding. Photos are your primary evidence for negotiations and any future damage claims.
- Flathead screwdriver: Probe suspicious areas on the floor and walls. Soft wood or thin steel that punctures easily is a red flag.
- Notepad or inspection app: Record measurements, observations, and locations of any damage systematically.
- Safety gear: Wear steel-toed boots and gloves. Container yards are active industrial environments, and some containers carry residue from previous cargo.
Beyond tools, you need a working knowledge of container grades before you arrive. Grades like WWT (wind and water tight), cargo worthy, and one-trip each carry specific condition expectations. If you skip this step, a seller can misrepresent a below-standard unit and you will not catch it on sight alone. Americaconex publishes a clear breakdown of container condition grades that is worth reading before any purchase.
If an in-person inspection is not possible, request a full photo set that covers all four exterior walls, the roof, the floor, both door panels, door seals, and the CSC plate. Photos taken in good natural light tell a different story than dim yard shots.
Pro Tip: Ask for photos of the container number from multiple angles. Cross-referencing the BIC code against the container's documented history can reveal age and previous use patterns you would not spot visually.
Exterior and structural inspection: a step-by-step walkthrough
The exterior is where structural problems begin, and it is the part sellers are most likely to minimize. Work through it in a fixed sequence so nothing gets missed.
Corner posts and base rails
Start at the corner posts. These four vertical steel columns carry the entire stacking load of the container. Serious cracks, bends, or deep rust on a corner post are disqualifying defects, not fixable cosmetic issues. Run your hand along each post and look for deformation at the top and bottom casting points where forklifts and cranes apply force.
Minor surface rust on the exterior panels is normal for a used unit and does not indicate structural failure. The distinction that matters is between surface oxidation and deep pitting that compromises the steel. Run your fingernail across any rust patch. If it flakes away cleanly and the metal underneath is firm, that is surface rust. If your nail sinks or the steel feels soft and layered, you are looking at structural corrosion.
Roof and sidewalls
Walk around the container and sight down the length of each wall from a low angle. Bulges and waves in the corrugated panels indicate impact damage or internal pressure from improper loading. A small dent in a side panel is cosmetic. A bowed section that spans several corrugations is not.

Climb up or use a ladder to check the roof. Pooled water causes the most roof damage in stored containers, so look for large dents that create low spots, and check the seam where the roof meets the top rail. Deep pitting on the roof or seams is where water gets in and where leaks start.
Doors and locking mechanisms
Step back and look at both door panels from a distance before opening them. They should sit flush in the frame with even gaps on all sides. Misalignment here is a significant issue. Misaligned doors and damaged seals allow moisture inside, and once moisture gets in regularly, mold and floor rot follow.
Open and close each door. They should open and close fully without excessive force, and the lock rods should engage the sockets cleanly without bending or grinding. Inspect the rubber door gaskets by pressing your thumb into them. Cracked, brittle, or flattened gaskets will not seal.
| Defect | Severity | Action |
|---|---|---|
| Surface rust on panels | Low | Acceptable, monitor |
| Deep pitting on roof or seams | High | Negotiate price or reject |
| Corner post bends or cracks | Critical | Reject unit |
| Door misalignment | High | Negotiate repair or reject |
| Cracked door gaskets | Medium | Negotiate price, budget for replacement |
| CSC plate missing or expired | High | Reject for shipping use |
CSC plate verification
Every container that has been used in international shipping carries a CSC (Convention for Safe Containers) plate, usually mounted on the left door. A legitimate CSC plate confirms the container's maintenance history and cargo worthiness. Check that the plate is present, legible, and that the ACEP (Approved Continuous Examination Program) date has not lapsed if you intend to use the container for active shipping.
Pro Tip: Photograph the CSC plate before you do anything else. If a dispute arises later, this one image establishes the container's documented compliance status at the time of purchase.
Interior inspection: floor, leaks, cleanliness, and odors
Once the exterior checks out, move inside. The interior reveals what the exterior conceals.
-
Run the darkness test. Close both doors fully and stand still for 30 seconds while your eyes adjust. Any light entering through the walls or roof means the container is not watertight. Pay particular attention to the corners, the top rail seam, and anywhere you noted exterior damage.
-
Inspect the floor. Container floors are typically plywood over steel cross-members. Walk the entire floor and press down on any area that feels soft or spongy. Use your screwdriver to probe discolored patches. Rot spreads faster than it looks, and a single soft spot near the door threshold often means the damage extends further inward. Also check for protruding bolt heads or broken floor sections that could damage goods placed on the floor.
-
Check walls and ceiling from inside. Shine your flashlight at a low angle across the interior walls. This raking light technique shows dents and corrosion that direct light misses entirely. Look at the top corners where the ceiling meets the walls, as this is where condensation accumulates and where internal rust often starts.
-
Do the smell test. Spend at least one minute inside with the doors closed. Chemical odors indicate previous carriage of hazardous materials. A petroleum smell, an industrial solvent odor, or anything that makes your eyes water should stop the transaction until the container's cargo history is documented. This matters especially if you plan to store food, organic materials, or equipment with plastic components.
-
Refrigerated units need extra attention. If you are inspecting a reefer container, check the refrigeration unit for operational status, inspect the insulated lining for cracks or separation, and confirm the drain plugs are intact.
Pro Tip: Bring a small battery-powered fan into the darkness test. Air movement highlights pin leaks by creating a slight draft that you can feel even when you cannot see the light source clearly.
Common inspection mistakes that cost buyers money
Even buyers who show up prepared make mistakes that cause them to miss serious problems or misjudge what they found.
- Treating all rust the same. Surface rust is a maintenance item. Structural rust is a deal-breaker. Most buyers look at rust, see an orange container, and either dismiss it entirely or reject the unit unfairly. The screwdriver test tells you which one you have.
- Skipping the door alignment check. It is easy to open a door, see it swings, and move on. Misaligned doors create ongoing moisture problems that ruin flooring and cargo within months. A door that opens but does not sit flush in the frame is a significant structural tell.
- Failing to document findings. Concealed damage accounts for 15 to 20 percent of cargo claims, and recovery rates sit below 40 percent. If you did not photograph a defect before purchase, proving it was pre-existing becomes very difficult. Photograph everything, even things that look fine.
- Relying solely on seller photos. Sellers are not necessarily dishonest, but photos are always taken in favorable conditions. Low angles hide roof damage, bright sunlight washes out rust, and no seller photographs the worst corner first.
- Skipping a professional inspection for large purchases. For a single 20ft storage unit, a buyer-conducted inspection is reasonable. For a fleet of 40ft containers destined for active shipping, bringing in a certified container inspector pays for itself immediately.
"If you find something during inspection and the seller cannot explain it, that uncertainty is the negotiation. You are not obligated to accept their explanation. You are obligated to protect your investment."
Final verification and making your purchase decision
After completing both exterior and interior checks, you have a picture of the container's actual condition. Now you need to interpret it.
| Condition | What it means | Recommended action |
|---|---|---|
| Surface rust only, floor solid, doors seal | Standard used unit, normal wear | Buy at listed price or small discount |
| Roof dents, floor soft in one area | Moderate wear, fixable issues | Negotiate 10 to 20 percent discount |
| Corner post damage or major corrosion | Structural compromise | Reject or require pre-sale repair |
| Missing CSC plate, unknown cargo history | Compliance and contamination risk | Reject for commercial use |
| Chemical odor, stained interior | Prior hazardous cargo | Reject or require full cleaning certification |
When defects are present but not deal-breakers, your inspection documentation becomes your negotiation tool. A written list with timestamped photos carries far more weight than a verbal complaint at point of sale. Factor in repair costs when calculating your counter-offer. A door gasket replacement runs around $150 to $300. A full floor replacement on a 40ft container can reach $1,500 or more.
If the inspection reveals a container in solid condition, moving forward is straightforward. If multiple moderate issues stack up, consider whether the combined repair cost plus purchase price still beats buying a cleaner unit. Learning how to buy a shipping container with a clear grading framework in mind helps you make that comparison quickly and confidently.
Pro Tip: Ask the seller to sign your inspection checklist before payment. Most legitimate sellers have no objection. Anyone who refuses is telling you something.
My honest take on container inspections
I've seen buyers skip the inspection entirely because the photos looked clean, and I've seen the exact opposite too: buyers so focused on surface rust that they walked away from perfectly sound containers. Both are mistakes. In my experience, the inspection is not about finding reasons to reject. It is about confirming what you are actually paying for.
The mistakes that hurt buyers most are the ones in the middle of the inspection, not the beginning or end. People start strong, check the exterior carefully, then rush through the interior because the container "looks fine." That's when the soft floor spot near the back wall gets missed. That's when the faint chemical smell gets rationalized away.
What I've found actually works is treating the inspection as a documentation exercise, not an evaluation exercise. Stop asking "is this okay?" and start asking "what exactly is this, and can I prove it later?" That shift changes everything. You stop second-guessing yourself, you stop being influenced by the seller standing nearby, and you end up with a clear written record that supports whatever decision you make.
The most overlooked tool in a container inspection is not a moisture meter or a flashlight. It is a fresh, unbiased pair of eyes that has read the inspection criteria in advance. When you know what you are looking for before you arrive, you find it.
— Alex
Buy with confidence from Americaconex
When you know how to evaluate shipping containers properly, the next step is finding a seller whose inventory matches that standard. Americaconex supplies new and used containers across the United States through a network of 30+ depots, and every unit is graded before it reaches a buyer. Their container grades page breaks down exactly what each condition classification means, so you arrive at an inspection knowing what to expect rather than guessing. Whether you need a WWT unit for secure storage, a cargo worthy container for active shipping, or a one-trip unit in like-new condition, Americaconex carries the full range with transparent pricing and fast delivery. Browse available containers or contact their team directly to discuss condition specifics before you commit.
FAQ
What is the darkness test for shipping containers?
The darkness test checks watertightness by closing the container doors and looking for any light entering through the walls, roof, or seams. Any visible light means the container is not fully sealed against water.
What are the biggest red flags when inspecting a used container?
Corner post damage, structural corrosion, misaligned doors, missing or expired CSC plates, and chemical odors from the interior are the most serious defects to watch for during a used container quality assessment.
How do I tell the difference between surface rust and structural rust?
Press a screwdriver or your fingernail firmly against the rusted area. Surface rust flakes cleanly and leaves firm metal underneath. Structural rust feels soft, layers away in sheets, or creates visible perforations in the steel.
Should I hire a professional inspector for a used container?
For a single unit used for ground-level storage, a careful buyer-conducted inspection is typically sufficient. For multiple units or containers intended for active international shipping, a certified inspector is worth the cost given the liability and compliance stakes.
How do I use inspection findings to negotiate the price?
Document each defect with timestamped photos and a written description, then get repair cost estimates before making a counter-offer. Presenting a seller with a specific repair cost tied to a specific defect is far more effective than a general request for a lower price.