TL;DR:
- Shipping containers provide weatherproof, cost-effective storage compared to traditional builds.
- Proper permits and foundation preparation are essential to avoid costly issues and ensure longevity.
- Reinforcing structural cuts, choosing quality containers, and optimizing ventilation prevent rust and leaks.
Running out of space is frustrating. Whether you're stacking boxes in your garage, renting a unit across town, or watching weather slowly ruin tools left outside, the problem is real and expensive. Shipping containers offer something different: steel-reinforced, weatherproof storage you can place on your own property. A well-converted container can give you more usable space than most garages, at a fraction of what a traditional build costs. This guide walks you through every step of a successful container storage conversion, from choosing the right unit to laying the foundation, adding modifications, and avoiding the mistakes that cost people thousands.
Table of Contents
- Assessing your needs and planning your container conversion
- Permits, zoning, and container delivery essentials
- Preparing the foundation: Options and best practices
- Converting and customizing your container for storage success
- Our hard-won lessons: What truly matters in container storage conversions
- Next steps: Find your best-fit shipping container solution
- Frequently asked questions
Key Takeaways
| Point | Details |
|---|---|
| Plan for real needs | Assess what you’ll store and plan a budget including foundation, permits, and modifications. |
| Mind local regulations | Confirm zoning and permits before starting to avoid costly delays or legal issues. |
| Choose the right foundation | Gravel pads or concrete piers are cost-effective and prevent water damage or rust. |
| Avoid structural errors | Reinforce cuts, control drainage, and don’t skip quality checks to prevent expensive fixes. |
| Invest for the long term | Spending more up front on quality saves much more over the years of use. |
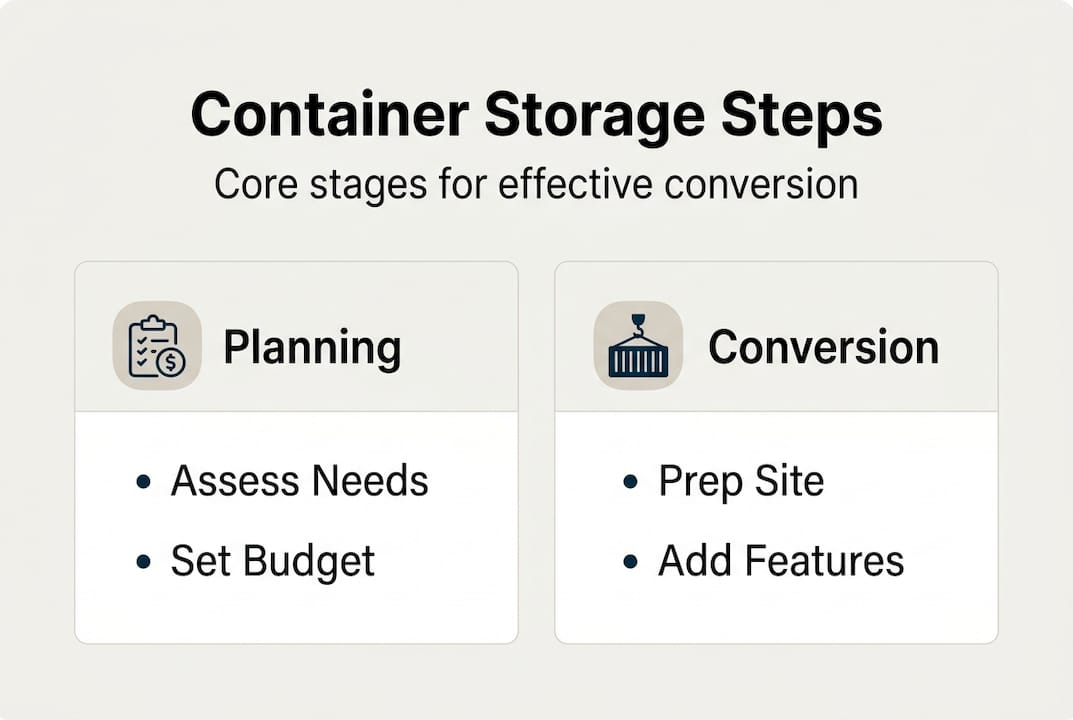
Assessing your needs and planning your container conversion
Before you spend a single dollar, you need to get clear on what you're actually storing. That sounds obvious, but it's the step most people rush. The type of items you plan to keep inside directly determines the container size, the modifications required, and your total budget.
Start by listing out your storage needs:
- Volume: How many cubic feet do you need? A standard 20ft container gives you roughly 1,170 cubic feet of interior space. A 40ft unit doubles that.
- Item type: Sensitive items like furniture, electronics, or documents need insulation and climate control. Tools and equipment are more forgiving.
- Access frequency: If you're pulling items in and out daily, you'll want additional door placements and interior lighting.
- Duration: Temporary storage needs fewer modifications. Long-term setups warrant better insulation and flooring.
Choosing the right container size is one of your biggest decisions. Most homeowners and small business owners find that a 20ft container works for moderate storage, while a 40ft is better for job sites or larger inventories. High cube units add an extra foot of vertical clearance, which matters if you plan to add shelving systems.
Budget planning deserves the same attention. A solid rule of thumb: storage conversions cost 40 to 60% less than traditional builds, typically running $100 to $200 per square foot, but poor planning can add thousands in avoidable fixes. Always pad your budget by at least 20% as a contingency.
| Container size | Interior space | Best for |
|---|---|---|
| 20ft standard | ~1,170 cu ft | Home storage, small businesses |
| 40ft standard | ~2,390 cu ft | Job sites, large inventories |
| 40ft high cube | ~2,700 cu ft | Tall equipment, shelving systems |
For a deeper look at what works for homeowners, the residential container storage guide breaks down real-world use cases. When evaluating condition, learn the basics from container quality fundamentals to avoid buying a unit with hidden rust or floor damage. And if budget is tight, there are legitimate ways to reduce spend covered in saving on container costs.
Pro Tip: Always overestimate your storage needs by at least 15 to 20%. A container that feels spacious today will fill up faster than you expect, especially on a job site.
Permits, zoning, and container delivery essentials
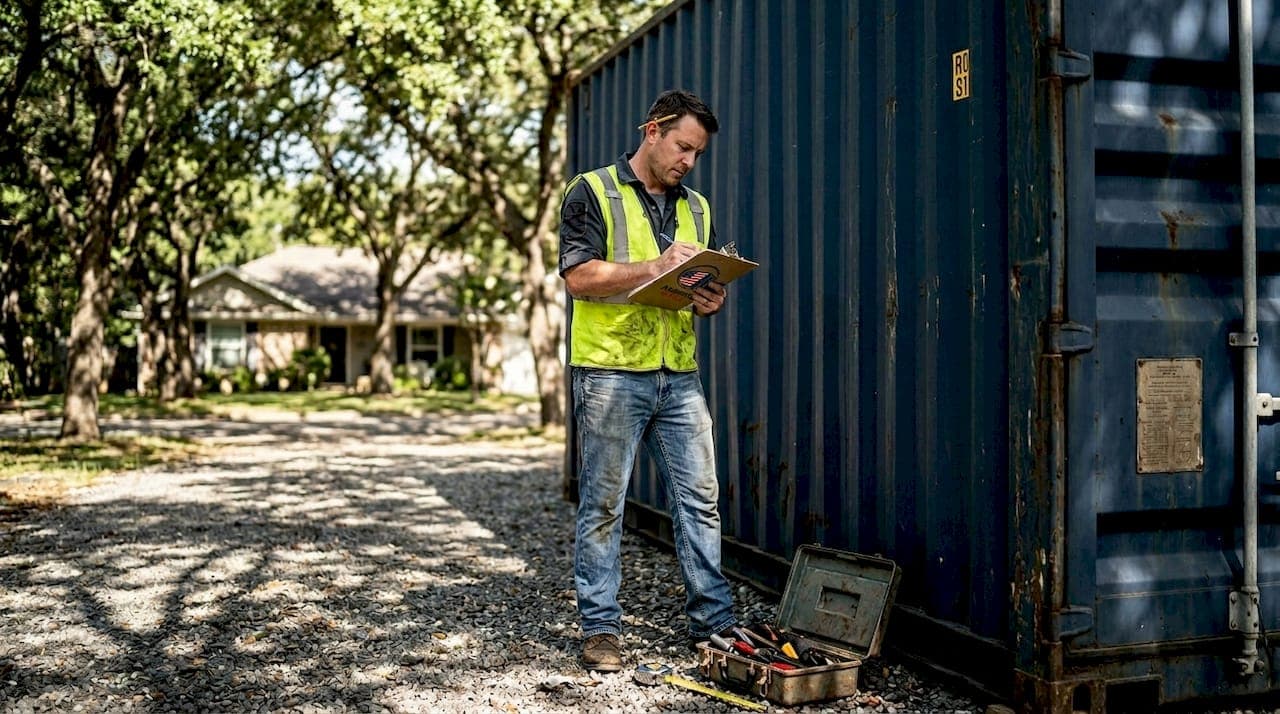
With your storage needs and budget mapped out, it's time to make sure your project meets local requirements and is set up for smooth delivery. Skipping this step is one of the most common and costly mistakes container buyers make.
Local regulations vary significantly depending on where you live. Rural properties often face minimal restrictions, while urban and suburban areas can require full building permits, zoning variances, and inspections. Here is what to verify before ordering:
- Zoning classification: Confirm that your property's zoning allows accessory structures. Some residential zones prohibit containers entirely.
- Permit requirements: US permitting costs vary widely, from around $500 to $1,200 in rural areas up to $3,500 to $6,000 in urban jurisdictions following IBC 3115 standards. Temporary storage may not require a permit, but any electrical work or structural modifications almost always will.
- HOA rules: If you're in a homeowner association, get written approval before delivery.
- Utility lines: Check for underground lines and overhead clearances at the drop-off site.
Check zoning and permitting first. Requirements can add thousands to your project if skipped.
Delivery logistics matter just as much as paperwork. A standard delivery truck needs roughly 100 feet of straight clearance to set down a 40ft container. Tight driveways, low-hanging trees, and soft ground can all turn a simple drop into a day-long headache.
Things to have ready before the truck arrives:
- A firm, level surface at the delivery point (gravel or compacted dirt works)
- Clear access with at least 14 feet of overhead clearance
- Someone on site to direct placement
Review your transportation options for containers ahead of time to understand delivery methods and what to prepare. Getting this right on the first visit saves you rescheduling fees and delays.
Preparing the foundation: Options and best practices
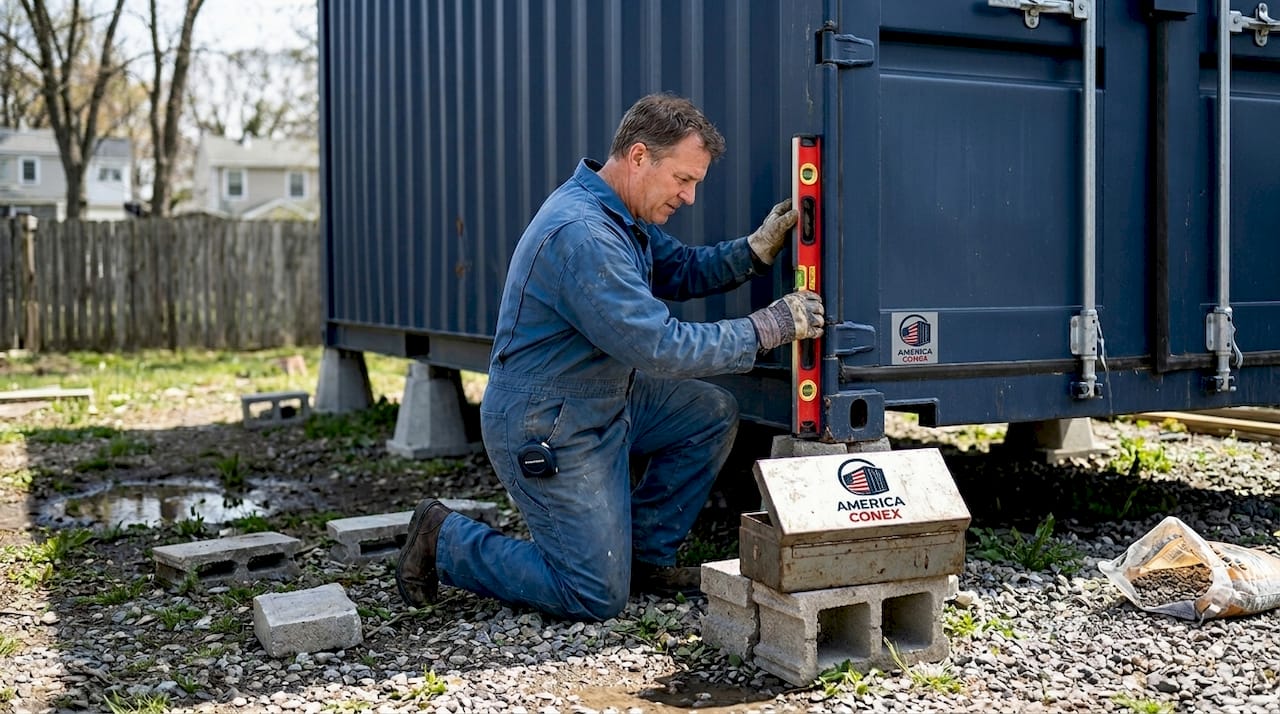
With your container delivered and paperwork in order, the next critical step is building a solid, lasting foundation. Containers are built to be stacked on ships and rail cars, so their weight-bearing points are the four corner castings. This means the foundation only needs to support those corners, not the full base. That distinction changes what makes sense structurally and financially.
Here are the most practical foundation options, ranked from most affordable to most permanent:
- Gravel pad: Most affordable option, typically $400 to $1,000. Provides excellent drainage and prevents moisture buildup under the container.
- Concrete piers: Mid-range at roughly $2,500 to $6,000 for a 40ft setup. Excellent stability and ideal for semi-permanent installations.
- Concrete slab: Most expensive at $3,000 to $6,000 or more, but offers the best base for long-term or heavily modified containers.
- Railroad ties or blocks: Low-cost option for temporary setups. Less stable on uneven ground but quick to install.
Elevation is the most critical factor. Foundation options for containers confirm that gravel pads and concrete piers provide the best balance of cost and stability, while also keeping the container base off the ground to prevent rust. A container sitting directly on soil will corrode faster than one elevated even a few inches.
Regional conditions also affect your choice. Frost zones require deeper foundations, while high-wind areas need anchor systems tied directly to the container's corner castings. Do not skip these steps if you're in a hurricane or tornado-prone region.
For more on matching foundation type to container use case, the foundation selection tips resource is worth reviewing. And once your foundation is set, keeping the site in good shape is addressed in maintaining site storage quality.
Pro Tip: Before committing to a foundation type, have a soil drainage test done. Poor drainage under your foundation will undermine even the best concrete work within a few seasons.
Converting and customizing your container for storage success
Once your foundation is in place, it's time to turn your container into a practical, secure storage solution. The modification process sounds straightforward until you hit the structural realities of cutting into a steel box engineered to resist ocean conditions.
Here is a reliable order of operations for basic container conversions:
- Plan all cuts on paper first. Know exactly where every door, vent, or window opening will go before you touch the container.
- Reinforce before you cut. Welding a steel frame around any planned opening maintains structural integrity. Skipping this step is expensive.
- Install doors and ventilation. Security doors with lockboxes are non-negotiable for storage. Add louvered vents to prevent condensation buildup.
- Add insulation. Closed-cell spray foam is the most effective option for storage containers. It controls moisture and temperature with a thin profile.
- Install shelving and lighting. Wall-mounted shelving systems maximize vertical space. LED strip lighting is low-cost and long-lasting.
- Inspect every penetration. Check every vent, door frame, and utility entry for gaps that could allow water intrusion.
The most common structural mistake people make is cutting into the container without reinforcing the opening. Cutting floor crossmembers weakens structure significantly if not reinforced, and excessive wall penetrations increase the risk of leaks and rust over time.
A basic conversion checklist:
- Security door with multi-point locking
- Louvered vents (minimum two, placed to allow cross-ventilation)
- Closed-cell spray foam insulation
- Weatherproof LED lighting
- Wall-mounted shelving
- Floor coating or rubber matting
For workflow-focused storage layouts, reviewing storage workflow efficiency will help you organize the interior so everything stays accessible and protected.
Our hard-won lessons: What truly matters in container storage conversions
After working through dozens of container setups for homeowners and businesses across the country, a few truths keep showing up. The biggest one: spending a little more upfront almost always costs less in the long run.
The most common misconception we see is that any used container will do. It won't. A unit with hidden rust, damaged flooring, or compromised seals will require repairs that dwarf what you saved on the purchase price. That's why container quality matters from the first day of your search, not after delivery.
We've also watched people skip permitting because it seemed like extra paperwork. Then they get hit with stop-work orders or removal notices that cost far more than the permit ever would have.
Three things that actually protect your investment: proper water drainage under and around the container, reinforcement on every structural cut, and verified compliance with local permitting before delivery day. These aren't exciting. But they're what separates a storage solution that lasts a decade from one that becomes a problem in two years.
Next steps: Find your best-fit shipping container solution
You now have a clear roadmap from planning through permitting, foundation work, and modification. The last piece is finding a container that meets your standards without surprises.
At America Conex, we supply new and used shipping containers for sale in 20ft and 40ft sizes, including standard and high cube units. Our inventory includes wind and water tight containers, one-trip units in like-new condition, and cargo worthy options for budget-focused buyers. With 30+ depots nationwide, we deliver fast and price competitively no matter your location. We're here to help you match the right container to your project, not just hand you a box and walk away.
Frequently asked questions
What foundation is best for a shipping container used as storage?
A gravel pad or concrete piers are the most affordable and effective options. Both prevent rust and instability by keeping the container elevated and well-drained.
Do I need a building permit to use a shipping container for storage?
It depends on your location. Permit requirements vary widely, and while rural areas may not require one for temporary storage, urban areas and any electrical or structural modifications almost always do.
How much does it cost to convert a shipping container into storage?
Most container storage conversions run $100 to $200 per square foot. Container conversions cost 40 to 60% less than a comparable traditional build, making them one of the most cost-efficient storage solutions available.
What are the biggest mistakes to avoid when converting a container?
The top three are skipping foundation prep, making unreinforced structural cuts, and ignoring drainage. Each one can result in costly repairs that far outweigh the cost of doing it right the first time.