TL;DR:
- Farm storage containers should be chosen and organized based on specific needs and items stored.
- Proper site prep, shelving, labeling, and zone creation improve efficiency and safety.
- Regular maintenance and thoughtful layout prevent common issues and maximize container usefulness.
Digging through a pile of tangled extension cords to find a single bolt, or discovering that your seed stock got soaked because bags were stacked against a leaky wall, these are the moments that cost you real time and money. Farm storage problems are not just inconvenient, they are genuinely expensive. Shipping containers have become one of the most practical tools in modern agricultural operations, offering durable, lockable, and weatherproof space that can be configured almost any way you need. This guide walks you through choosing the right container, setting it up properly, organizing it for peak efficiency, and avoiding the mistakes that trip up even experienced farmers.
Table of Contents
- Assessing your storage needs and container choices
- Planning the layout: Tools, supplies, and safety
- Step-by-step: Organizing your farm shipping container
- Improving, troubleshooting, and avoiding common mistakes
- Our experience: Why strategic organization beats size every time
- Ready to transform your farm storage? Start here
- Frequently asked questions
Key Takeaways
| Point | Details |
|---|---|
| Strategic container selection | Choosing the right type and size of container boosts efficiency and controls costs. |
| Preparation matters | A solid foundation and essential tools make your storage setup last longer and safer. |
| Step-by-step organization | Following proven steps and using zones, shelves, and labels keeps storage accessible and neat. |
| Adapt for seasons | Periodic reviews and adjustments ensure your container works for changing farm needs all year. |
| Expert help saves time | Partnering with a container specialist streamlines the whole process from purchase to setup. |
Assessing your storage needs and container choices
Before you move a single shelf or order a container, you need to get honest about what you are actually storing. Farm storage is not one-size-fits-all. You might need to separate chemicals from feed, keep tools accessible near the field entrance, or store bulk equipment that only comes out during harvest. Each of these scenarios calls for a different approach.
Start by listing everything you plan to store, grouped by category:
- Heavy equipment and implements (augers, sprayers, small tractors)
- Feed, seed, and grain bags (moisture-sensitive, need ventilation)
- Chemicals and fertilizers (require sealed, labeled zones away from food products)
- Hand tools and small parts (high frequency of use, need easy access)
- Seasonal items (harvest equipment, irrigation parts used only part of the year)
Once you have that list, you can match it to a container size. Most farms find that a 20-foot container handles tool and chemical storage well, while a 40-foot unit suits larger equipment or multi-category storage. High cube containers, which stand about a foot taller than standard units, give you that extra vertical room that makes a real difference when you are installing shelving systems.
The rent versus buy question comes up early. As a general rule, renting suits seasonal needs like harvest overflow while buying is the smarter financial move for permanent on-farm storage. Containers also offer lower lifecycle costs than traditional barns, but you still need to plan for a solid foundation and delivery logistics before anything else.
If budget is a consideration, there are real ways to save on container costs without sacrificing quality, including opting for used wind and watertight units that are structurally sound but more affordable than one-trip containers.
| Feature | Renting | Buying |
|---|---|---|
| Best for | Seasonal or short-term needs | Permanent or custom storage |
| Upfront cost | Low | Moderate to high |
| Customization | Limited | Full freedom |
| Long-term value | Lower | Higher |
| Flexibility | High | Lower |
Pro Tip: Always size up slightly when in doubt. A container that feels oversized today will feel perfectly right after your operation grows by even 20%.
Planning the layout: Tools, supplies, and safety
With the right container chosen, the next step is preparing the space and gathering what you need to stay organized and safe. Jumping straight into loading without a plan is one of the most common mistakes farmers make. The result is a container that looks full but functions poorly.
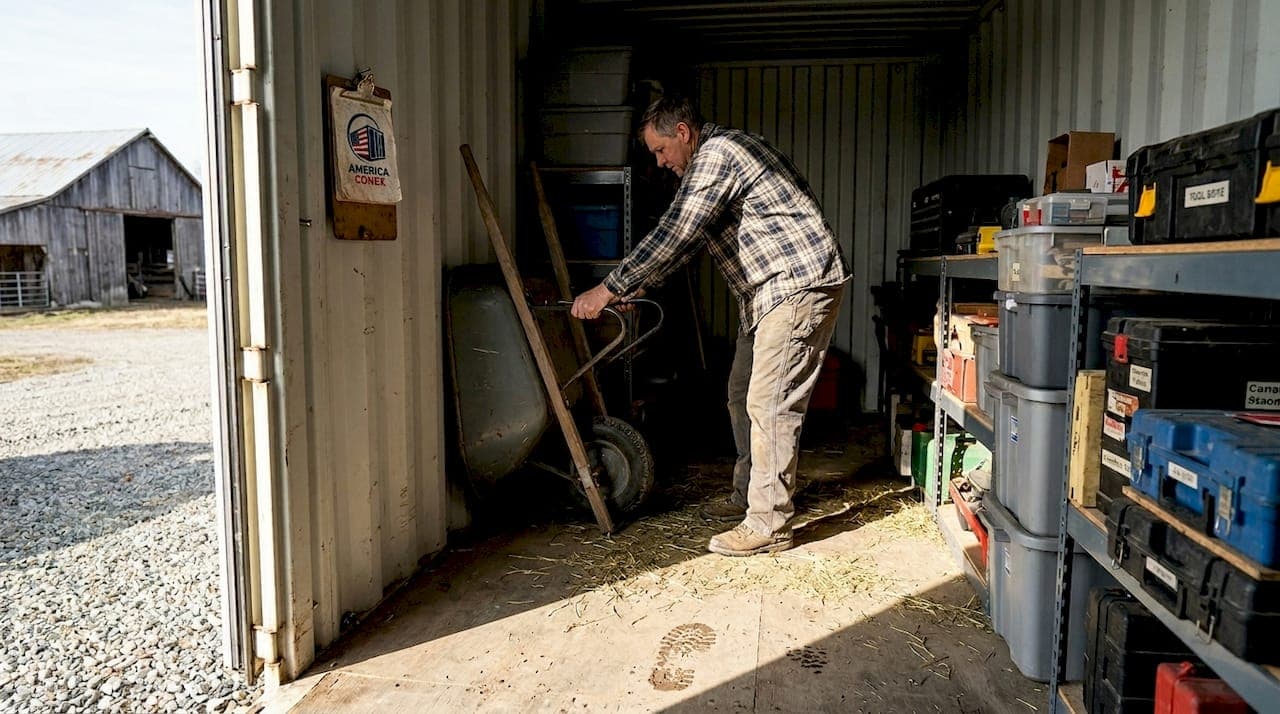
Site preparation matters more than most people realize. Your container needs level ground, ideally with gravel or concrete underneath to prevent shifting and moisture wicking up from the soil. Drainage around the container keeps groundwater away from the base. Think about access too: can a tractor or forklift get within range? Is the door facing the right direction for your daily workflow?
A stable, well-drained foundation does not just protect the container itself. It protects everything inside it. Containers placed on unstable or wet ground are far more likely to develop floor rot, door alignment issues, and interior condensation problems over time.
Getting familiar with basic shipping container terminology before setup helps when talking to suppliers or ordering accessories like locking bars, vents, or fork pockets.
Here is a breakdown of what you need before you start loading:
| Item | Purpose |
|---|---|
| Adjustable metal shelving | Vertical storage for bins, bags, and tools |
| Pallet racking (for 40ft units) | Heavy equipment and bulk storage |
| Plastic stackable bins | Categorized small parts and hardware |
| LED strip or shop lighting | Visibility in low-light conditions |
| Rubber floor mats or plywood | Protect flooring, reduce moisture contact |
| Desiccant packets or vent units | Humidity and condensation control |
| PPE (gloves, eye protection) | Safety during setup and chemical storage |
| Gravel or concrete pads | Foundation and drainage |
For supply sourcing, keep these tips in mind:
- Buy shelving from industrial suppliers rather than home improvement stores for load-bearing capacity
- Use color-coded bins for fast visual identification without reading every label
- Source desiccants in bulk if you are in a humid climate, replacing them monthly
- Check that your lighting solution is battery backup capable for power outage situations
Reviewing container storage safety practices before you finalize your layout can save you from costly compliance issues, especially if you are storing regulated chemicals or fertilizers.
Step-by-step: Organizing your farm shipping container
Now that your space is prepped and you have everything on hand, it is time to organize your container for peak efficiency. The goal is a system where anyone on your team can find what they need in under two minutes without asking for help.
- Clean and inspect the interior. Before anything goes in, sweep out debris, check for rust spots, and inspect the floor for soft or rotted boards. Address any issues now. Foundation and delivery planning should already be complete before this step.
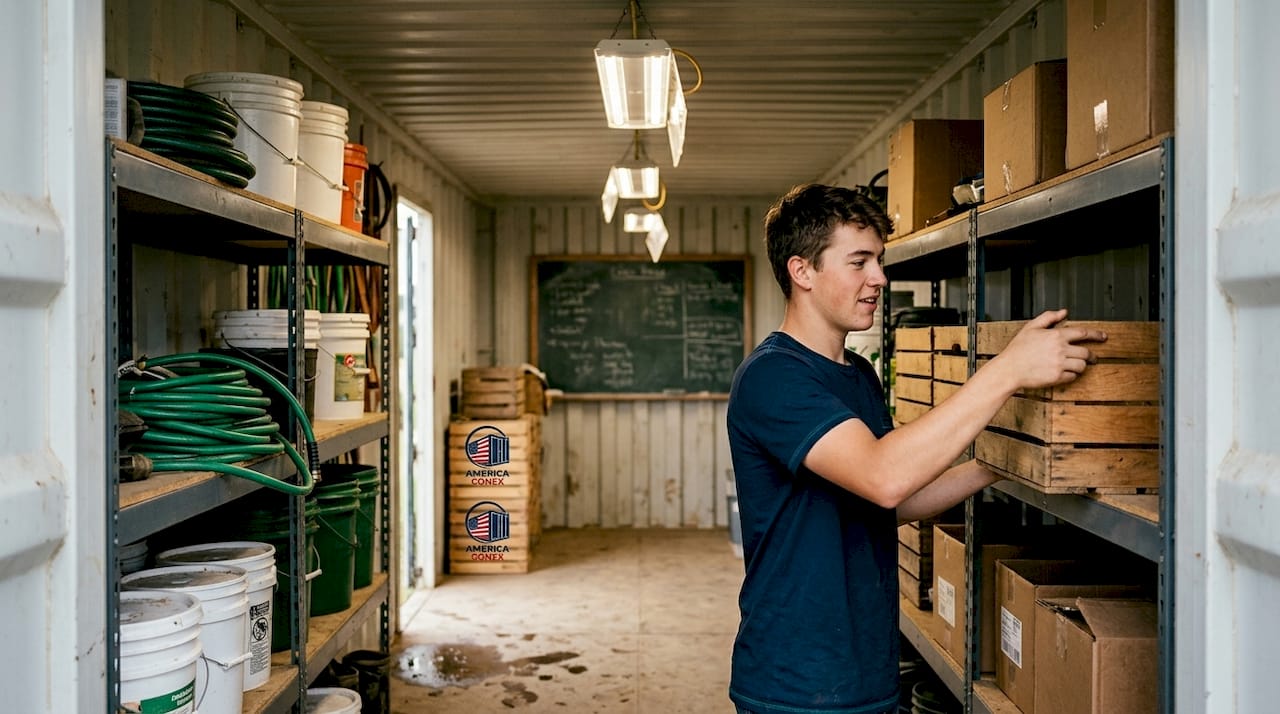
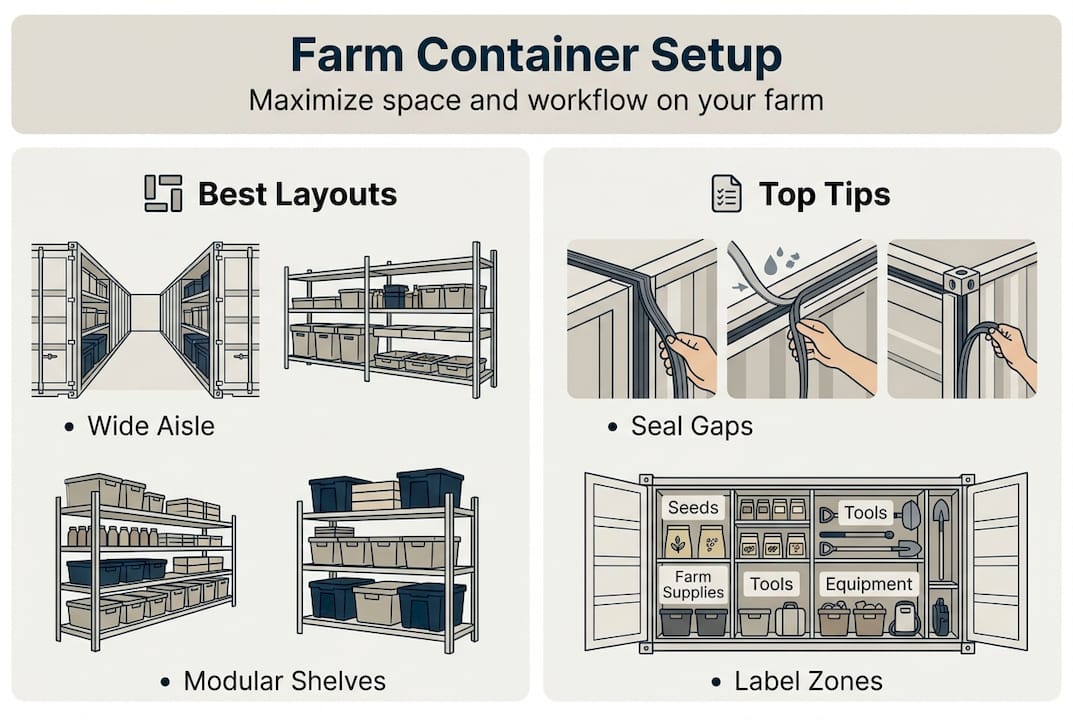
- Install shelving and racks first. Mount wall-mounted shelves along the sides and back before you bring in any inventory. This forces you to plan zones before clutter creeps in.
- Create storage zones. Divide the container into distinct areas: a chemical zone near the door with ventilation access, a tool wall with pegboards or magnetic strips, a bulk storage zone for bags and bins at the rear, and a seasonal zone for items used less frequently.
- Sort and load by frequency of use. Items you reach for daily go near the door at chest height. Weekly items go on mid shelves. Rarely accessed equipment goes to the back or high shelves.
- Label everything. Use large, laminated labels on shelves and bins. Include the contents and a reorder threshold if applicable. This single habit eliminates the most common source of farm storage frustration.
- Use vertical space aggressively. Most farmers use only the bottom 4 feet of a container. With proper shelving, you can use 7 to 8 feet of height, effectively doubling your usable storage area.
For container workflow efficiency, think about how your team actually moves through the space. Wide center aisles matter more than cramming in an extra shelf.
Pro Tip: Modular shelving systems that bolt together without welding are worth the extra upfront cost. You can reconfigure them in an afternoon when your storage needs change, rather than starting from scratch.
Pest protection is often overlooked at this stage. Seal any gaps around vents, use steel wool in corners where wiring enters, and avoid storing organic materials directly on the floor. Consider equipment storage solutions designed specifically for farm use if you are storing machinery with fuel or oil.
Improving, troubleshooting, and avoiding common mistakes
Even the best container setup needs adjustment. Here is how to keep yours effective, avoid pitfalls, and adapt for changing farm needs.
| Common mistake | Recommended solution |
|---|---|
| Overloading the front half | Distribute weight evenly front to back |
| No lighting installed | Add LED shop lights before loading |
| Mixing chemicals with feed | Create separate, clearly marked zones |
| Skipping foundation prep | Always use gravel pad or concrete base |
| No inventory system | Use a simple whiteboard or app log |
| Ignoring ventilation | Install vented panels or louvered doors |
Seasonal adjustments are where most farm container setups fall short. During harvest, your storage needs explode almost overnight. Plan for this by keeping one dedicated zone clear for temporary overflow. After harvest, rotate that space back to standard use.
For seasonal container storage needs, some farmers use a second container brought in temporarily during peak periods. This is where the rent option makes genuine economic sense.
Simple upgrades that make a big difference:
- Smart padlocks with keypad or Bluetooth access eliminate lost key problems
- Insulation panels on the ceiling reduce temperature swings that damage seeds and chemicals
- Motion sensor lighting saves power and turns on the moment you step in
- Magnetic tool strips free up shelf space for bins and bags
Containers offer lower lifecycle costs compared to traditional barns, but only when you maintain them properly. Schedule a quick monthly walkthrough: check for moisture, inspect door seals, review your labeling system, and note anything that has drifted out of its zone. Fifteen minutes a month prevents hours of reorganization later.
Pro Tip: Take photos of your organized container right after setup. When things inevitably shift during busy seasons, you have a reference point for getting back to your baseline system fast.
Our experience: Why strategic organization beats size every time
After working with farmers across the country, from small hobby operations to large commercial growers, one pattern keeps showing up. The farms with the most functional storage are almost never the ones with the biggest containers. They are the ones with the most thoughtful layouts.
We have seen 40-foot containers turned into unusable jumble within a single planting season, and 20-foot containers running like precision workshops. The difference is always intentionality. A farmer who maps out zones, commits to a labeling system, and uses vertical space well will outperform one who just buys more square footage every single time.
The temptation to solve storage problems by adding space is understandable. But it tends to delay the real work, which is building a system. A good real-world workflow strategy treats the container like a tool, not a dumping ground. Every cubic foot should have a job. When it does, you stop losing time hunting for parts and start spending that time farming.
Ready to transform your farm storage? Start here
You now have a clear roadmap for turning a bare metal box into one of the most productive spaces on your property. The next step is making sure you start with the right container.
America Conex supplies new and used shipping containers for sale to farms of every size, with delivery from 30+ depot locations nationwide. Whether you need a used wind and watertight unit for a seasonal setup or a one-trip 40-foot high cube for a full equipment overhaul, we match you with the right container at a fair price. Our team understands farm logistics and is ready to help you figure out exactly what works for your operation, from size selection to delivery scheduling. Getting started costs nothing but a conversation.
Frequently asked questions
Is it better to rent or buy a shipping container for farm use?
Renting suits seasonal needs like harvest overflow, while buying gives you full customization and lower total cost for permanent, year-round storage.
What size shipping container works best for most farms?
Most farms do well with a 20-foot container for tools and chemicals or a 40-foot unit when storing larger equipment or managing multiple storage categories at once.
How can I maximize space inside my container?
Install adjustable metal shelving to use the full vertical height, assign labeled zones for each category, and use stackable bins to keep small parts from taking over valuable shelf space.
How do I keep my farm shipping container weatherproof and pest-free?
Use sealed containers with proper vent panels, run monthly inspections of door gaskets and floor boards, place desiccant packets to control humidity, and seal any gaps with steel wool to block rodent entry.